Pages

Monday, May 27, 2013

A Little This, a Little That, and Just a Few Cards...


I know it must appear that I have fallen off the face of the earth, but I promise that I haven't! May is an incredibly busy month around our house, (as I am sure it is at yours too!), with lots of baby/bridal showers, weddings, retirements, graduations, birthdays, Mother's Day, etc.

The last day of school for Broken Arrow students was Friday. I have 2 days left to work this week then I will be on summer break - WOOHOO!! Along with finally being able to catch up on my blogging, I've got a long list of projects to tackle while I am on break; everything from crafting to gardening to cleaning out closets and drawers...it will be a productive summer for me!

About the only crafty things that I have done lately though, besides working in my garden patch and flower beds, is make a few cards for the celebrations that have gone on this month. Here are some photos of a few of the cards that I have recently made:

The first is a retirement card for my friend David J. who is a history teacher at the school where I work. I printed a bicycle image that I found over at the Graphics Fairy blog onto a page from an old dictionary. I adhered the dictionary page to a piece of cardstock that I distressed by inking the edges, then added brads and jute twine to frame the outer edge, and adhered it to a white card base:


Next up is the sweet and simple Mother's Day card that I made for my mom. I stamped flower stems onto a piece of yellow gingham cardstock and adhered it to a blank white card base. I attached little felt flowers to the tops of the stems with Glue Dots. I then added blingy centers to the felt flowers and placed stamped polka dot circles, that I cut in half, along the base of the card. The sentiment strips on the front were tied with coordinating ribbon and "popped up" using 3-D dots:


Three of my friends and co-workers Linn B., Marilyn T., and Phyllis S. also retired this month. Below is a photo of one of 3 similar cards that I made for these terrific gals! I began by adhering a bright, cheerful piece of yellow gingham cardstock to the front of a blank white card base. I then added a strip of embossed felt flower ribbon in orange, light blue and pink. I printed the sentiment strips on my computer, cut them out, inked the edges and attached them to the fronts of the cards using 3-D dots. I tied pieces of baker's twine to the lower sentiment to separate the words:


Here's a view of the inside of one of the cards. I cut out and inked the sentiment strip to match the strips on the front of the card. I then used my butterfly punch and punched out the butterfly shape from a bright coordinating piece of printed cardstock. I attached the butterfly to the card on the right wing only, and then carefully bent the left wing upward so that when the card is opened it pops up to add a little dimension:


I also made a retirement card for my good friend Joe N., who is the head of the English department at the school where I work, but I forgot to take a photo of it to share with you...arrrgh!! Oh well - guess I'll just describe that card to you - LOL! I used an aged looking piece of patterned paper that had old-timey looking clocks on it. I looped jute twine around the card and tied it up with a cute little silver key. (I thought that I had snapped a photo of it along with the one's above, but I somehow managed not to - sorry!)

On a final note, for those of you who read my blog and live in other states/countries, I am sure that you heard about the terrible tornadoes that have recently hit Oklahoma. Thankfully the area where I live, which is in the NE corner of the state, was spared. My brother-in-law lives in Moore, where the F5 tornado struck, and we are so grateful that he is okay as well. Our hearts break for the families that were struck by the devastation and lost not only their homes and belongings but loved ones as well. Please remember these folks in your thoughts and prayers as the weeks go by...they have a long road of healing and recovery ahead of them.

Thanks for taking the time to drop by today! More projects are in the works friends, so stay tuned for a summer chocked full of crafty and organizational goodness!

Wishing you a wonderful week ahead!

Photobucket

Saturday, May 25, 2013

Silly Saturday


Sorry, folks! I know this is corny but I just couldn't resist!! Hee! Hee! :)

Photobucket

Saturday, May 18, 2013

Monday, May 13, 2013

Up-cycling Old Crocks Into Cute Patio Planters...


Good morning, folks! First off let me apologize for being a major blog slacker lately. It's a SUPER busy time of year...lots of weddings, baby showers, retirement parties, graduations and the like. Also, at work we've all been knee deep in EOI (End of Instruction) testing, which we finished up last week. I haven't had time to read/comment on my favorite blogs, or keep up with comments left for me, let alone get much crafting or cooking/baking done. I've only got 12 more days of work left until I am on summer break - WOOHOO!! - so I hope to get back on track with my blogging, cooking and crafting!

In the little bit of spare time that I have had, Mike and I have been doing some work in the yard by cleaning out flower beds, planting new flowers, several tomato and cucumber plants and re-mulching everything. Today's quick post is about up-cycling old crocks that may have chips and cracks into pretty planters for your patio. In the first photo below I turned an old crock into a super cute planter. (Recently my friend Kibbie was cleaning out cabinets to prepare for her kitchen remodel, and gave me several crocks that she no longer wanted. Thanks, Kibbie!!)


Next is a planter that I made from one of my crock pot liners that cracked on the bottom. (The crack is great for drainage when the crock is used as a planter, but not so good when trying to cook a roast for supper - HA! HA!) I lined the bottom with some river rocks, filled it with potting soil, and then added lots of pretty flowering plants and a little birdhouse. It really brightens up the bottom shelf of the baker's rack that is on our back patio!


Thanks for taking time to stop by my blog today! Have a TERRIFIC week!!

Photobucket

Sunday, May 12, 2013

Quote Sunday: Happy Mother's Day!


Wishing all the moms out there a very happy Mother's Day!

Photobucket

Wednesday, May 1, 2013

Simple, Yet Elegant, Framed Art


Good morning! Recently I was digging through my craft supply stash and came across a frame that I had forgotten I purchased on sale at Hobby Lobby. The frame has a white pre-cut mat with a 4" x 4" opening, and the glass on the frame is etched around the outside edges. There is a nice space between the mat and the glass, which I knew would allow me to add bulky, layered items inside the mat opening without the items getting squashed by the glass front. Anyhoo, using some other supplies that I had on hand, here's what I came up with:


I REEEEALLY love how it turned out, don't you?? Here's how I made it:

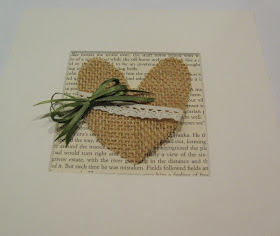
Begin by gathering some things that you think you might like to use in your art piece. I cut a heart-shape from a scrap of burlap that I had, and then grabbed some other things that I thought would accent the burlap nicely. (Such as lace, a printed page from an old book that I rescued from the trash, a little key, a paper rose, etc.)


I started out by removing the mat and picture insert from the frame. I cut the book page to measure 4" x 4" to fit the inside of the mat, and attached the cut book page over the "photo" on the insert paper:


I then attached the white mat over the insert paper, centering the book page in the mat opening:


Using a scrap of burlap, I cut a heart-shape to fit the mat opening and attached a piece of lace diagonally across the burlap heart:


I formed a multi-loop bow from skinny green satin ribbon to form dimensional "leaves" for the paper rose that I would attach on top of the ribbon bow:


I then made a bow from additional lace, attaching a button and decorative key. Using brads, I attached a metal "love" tag to the top of the burlap heart and then added a pearl bead to the inside of the paper rose, before inserting the artwork into the frame:


Once again, here's a photo of the finished artwork...


Wouldn't this make a cute wedding or anniversary gift?? My crafty-mental wheels are turning and I know that I'll be making more similar pieces like this in the near future! :)

Thanks for looking! Have a great day!
Photobucket