
Hi! In February I held a workshop on how to create decorative and functional dry erase boards from 11" x 14" picture frames. The workshop was a hit, and the dry erase boards turned out SO CUTE! The products shown in these instructions are from CTMH, but I've made several other dry erase boards for gifts using other papers and products. Here are the instructions on how you can create one of your own:


Cut a piece of Colonial White cardstock to 10" x 3 3/4" and a piece of patterned paper to 9 1/2" x 3 1/2". (I used striped paper from the CTMH "That's Amore" paper collection). Adhere striped paper to cardstock and set aside.

Cut a piece of Colonial White cardstock to 6" x 4 1/2" and a piece of patterned paper to 5 1/2" x 4". Adhere patterned paper to cardstock and set aside. Cut a piece of Blush cardstock to 4" x 3 1/2", and using a paper piercing tool, poke holes in 3 of the 4 corners. Attach black brads in these 3 holes and set aside.

On a scrap piece of cardstock, stamp desired images. (I used images from the CTMH December 2009 Stamp of the Month "Notice the Details"). Cut out images and set aside.

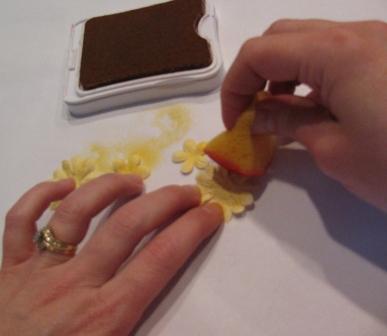
Sponge ink color of your choice onto CTMH White Daisy flowers, attach red brads through the centers, and set aside.
Cut a piece of black grosgrain ribbon 11" long, apply adhesive and adhere to chipboard/cardboard frame insert that you've decorated with patterned paper.

Create a tab from Blush cardstock, (I used the tab punch from McGill), and stamp "Remember" on the tab. Attach tab to the top of the long cardstock/patterned piece. Using a paper-piercing tool, punch holes in either side of the tab, through all the layers, and attach black brads. Add this piece to the right side of the patterned paper you've adhered to the chipboard/cardboard frame insert as shown in photo below.

Add other stamped elements to cardstock pieces as shown, and adhere to chipboard/cardboard frame insert:


Attach flowers with Glue Dots:

Re-assemble frame by placing decorative base on the glass front, face down. Your dry erase board is now ready to display on an easel or hang up on a wall. Use a standard dry erase marker, (not a permanent marker!), to make notes on your dry erase board. Clean with a baby wipe or a paper towel sprayed with Windex. Here's another look at the finished product:
I hope this little tutorial has been helpful...I would LOVE to see your dry erase board creations as well! Feel free to email photos of your creations to me as well as any comments or ideas that you may have!
Have a blessed day!
Becky
I have been looking for this tutorial so tfs...I think these would make great gifts!
ReplyDeleteThank you for sharing this - I was able to make one fairly quickly by borrowing your embellishment ideas! :-) If you'd like a picture just email me back, ok?
ReplyDelete~Debbie
~a fellow CTMH consultant
Hi, Debbie! I'd love to see a picture of your dry erase board! Please do email a pic to me! Thanks...so glad that my instructions could help!
ReplyDelete