Showing posts with label Tags. Show all posts

Thursday, October 22, 2015

Birthday Pie Box

Good evening!! This has been a busy birthday week for us, with 3 birthdays to celebrate! One of those birthdays was celebrated by our family friend, Ray F., who is the hubby of my pal Megan. Ray's FAVORITE pie is Dutch Apple, so I whipped one up for him. (You can click HERE for my Dutch Apple Pie recipe.)

Once the yummy pie was baked, I needed to wrap it up nice and pretty, so here's what I came up with:

Earlier in the week I went by a local bakery and purchased a cake box:


Since I baked the pie, and Merritt's did not, I didn't want their logo on the box, so I decided to creatively cover the box with scrapbook paper to give the effect of a quilt block:


I even made a coordinating tag:


I then lined the box with white tissue paper and placed the warm pie into the box:


Using some strips of red tulle, I tied a pretty bow and attached the tag:


SO SIMPLE!! I plan to pick up some more cake boxes and decorate them for giving baked Christmas goodies in as well.

Have a WONDERFUL Friday and a FANTASTIC weekend!!

Blessings,
Photobucket

Monday, June 22, 2015

Flowers From My Garden and a Doodle Art Tag...

Good evening! We had a nice, sunny weekend here in Oklahoma and my flowers are LOVING all of the sunshine! My sweet friend Megan F. has been a little stressed out lately with lots of last-minute family activities, so I decided to cut some of the pretty flowers from my backyard gardens and make a bouquet for her:


I also doodled the cute tag that I tied onto the vase that I placed the bouquet in. Megan is such a kind and giving person, always going the extra mile for everyone else and putting herself on the back burner, so I wanted to let her know that she is loved and appreciated and put a smile on her face. :)

I'm currently working on several projects, one of those being a memory box project for a friend that recently had her first grandchild, so I'll be sharing those with you in the near future. I also finished reading two more Philippa Gregory novels about the Tudors, (I'm REALLY ADDICTITED to her novels!!!), so I'll be sharing book reviews with you very soon, too.

Wishing you a blessed week!

Photobucket

Monday, April 22, 2013

Recipe of the Week: Pink Flamingo Cupcakes (Plus a Printable Sheet of Cupcake Toppers!)


A couple of weeks ago I was messing around in the kitchen and came up with an idea to make "Pink Flamingo" cupcakes to share with some of my friends. If you have a Sonic in your area, you can order a drink called a "Pink Flamingo", which is a lemon/lime concoction with cherries...this is where I got the idea to create cupcakes that would sort of taste like the beverage. After I made the cupcakes, (which turned out great!), I decided that they needed some cute little pink flamingo toppers. Using a clipart image I found in Word, I created a pdf sheet of pink flamingos that you can click on, save and print to use on your cupcakes too. :)

Now, let's make some cupcakes!!

Cupcake Instructions:

Using a boxed white cake mix, prepare according to package directions EXCEPT in lieu of water add an equal amount of Sprite or 7-UP. Drain a jar of maraschino cherries, (reserving the liquid to use in the frosting), and coarsely chop the cherries. Fold chopped cherries into cake batter. Spoon batter into cupcake liners that have been placed in muffin tins, and bake according to package directions. Cool cupcakes before frosting with cherry-vanilla butter cream frosting.

Cherry-Vanilla Butter Cream Frosting Ingredients and Instructions:
  • 2 sticks of softened unsalted butter
  • 2 Tablespoons milk
  • 2 Tablespoons cherry juice
  • Pinch of salt
  • 1 Tablespoon vanilla
  • 4 cups powdered sugar
Beat butter, salt and vanilla together until creamy. Gradually beat in sugar, milk and cherry juice until frosting is smooth and creamy. Frost cooled cupcakes, add rainbow candy sprinkles and flamingo toppers to cupcakes, serve to friends and enjoy!

Here's how I made the toppers:

Click on the pdf sheet above, save and print on white cardstock. Using a 1 1/2" circle punch, punch out the flamingos and set aside. Using a 1 7/8" scallop punch, punch out 2 aqua blue cardstock scallops for every 1 flamingo circle. Run scallops and flamingo circles through a Xyron adhesive machine:


Attach flamingo circle to the center of an aqua blue scallop. Peel one of the aqua blue scallops from the Xyron sheet and attach a toothpick as shown below:


Peel off the scallop with the flamingo, carefully line up the scallops, and adhere to scallop with the toothpick in the center. Press the edges firmly together so that the toothpick stays in place:


Carefully insert the picks into the cupcakes, serve and enjoy!

Wishing you a blessed week, friends!

Photobucket

Friday, January 25, 2013

Happy Birthday Cardboard Tag


While piddling around with some crafting scraps the other day, I ended up creating this really cute birthday gift tag. It was so easy to make...

I started out with a piece of thin corrugated cardboard, (that had originally been destined for the trash can - ha! ha!), and cut it into the shape of a tag. I found a silk flower in one of my craft drawers, so I folded it in half and held it in place with a glue dot. To create the flower center I simply used my scallop punch and a piece of peachy-colored cardstock. I folded the scallop, attached it to the folded flower center with additional glue dots, and then attached a little knotted piece of ribbon to the scallop. I then layered the flower on the tag with a paper doily, added a stamped happy birthday sentiment and tied coordinating ribbons through the hole at the top of the tag so that I could add it to a gift bag when needed. TADAH! A cute and super easy tag all ready to go!

Thanks for stopping by today. Enjoy your weekend, Friends!

Blessings,
Photobucket

Saturday, June 4, 2011

Saturday Gardening Incident; A Little Watermelon Card and a Couple of More Tags...

Happy Saturday! I spent my morning working out in my flower beds and had a little accident...caught my left index finger in the loppers as I was trimming some hedges and cut it pretty bad  - owie! The loppers cut through my finger nail, down into the nail bed, so I immediately ran into the house, washed my bloody finger good with soap and then applied peroxide, antibiotic cream and a bandaid. Good grief! It's my own stupid fault, though, for not putting on my gardening gloves - geesh! Oh, well...after I determined that the tip of my throbbing finger was still attached, I bandaged it up, put my gardening gloves on and went back to work in my flower beds, which by the way, look really, really nice!!

Enough drama for one day! I thought I'd share with you a few quick things that I made...

First is a cute little watermelon thank you card:


Next is a fun frog tag:


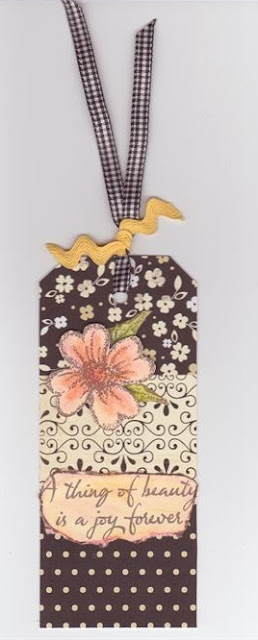
And last, but not least, is an elegant floral tag:


Enjoy your Saturday and be safe!! (Meaning wear garden gloves when using loppers - ha! ha!)

Photobucket

Wednesday, June 1, 2011

Tag Creations

Tags are one of my favorite things to make! They are a fun way to use up scraps of paper, stickers, stamped images, ribbon, etc. Here are 3 tags that I recently made:

I created this tag to attach to a wedding gift for a friend's daughter that recently got married:


The hugging couple image came from an old book, "Where the Sidewalk Ends" by Shel Silverstine, that I rescued from the trash. I punched the image out using a 1 7/8" circle punch, and then matted the images on slightly larger circles that I cut from black cardstock and pink/white polka-dot cardstock. I attached the tag to a lime green gift bag, which matched the lime green ribbon on the tag.

I made the next tag to attach to a gift for my friend, Tracy S., using images that I cut out of "recycled", store-bought cards and scraps of lace and ribbon:


Next is a tag that I created as a proto-type. My friend, Tracy, needed personalized tags to attach to gift bags she was preparing for her daughter's soccer team tournament, so here's the design that I came up with for her:


The final tags that I ended up making for her used a blue accent at the top, rather than a red one, since her daughter's soccer team uniform color is blue. (Sorry, but I didn't take a picture of the final tags!) The soccer ball is an image that I found online and resized so that I could use my 1 1/2" circle punch to punch them out. I attached the soccer balls to the tags with 3-D dots.

Wishing you a fantastic day!
Photobucket