Showing posts with label Blog Candy. Show all posts

Sunday, July 1, 2012

Mini Altered Tin Scrapbook Tutorial and Scrap-It-Girl's July Challenge: "Good Things Come in Small Packages"


WOW! The month of June just flew by, don't you think so too? With a new month comes a new challenge from Scrap-It-Girl; and as a member of her Design Team, I am excited to announce that I am hosting this month's challenge: "Good Things Come in Small Packages". Below are the photos of the project that I created for this challenge...it is a mini altered tin that I turned into a friendship scrapbook for my best bud, Jamie. Inside are a few fun photos of us, as well as little pockets that hold tags with friendship quotes...some of them serious, and some of them just down-right funny! (There is a step-by-step tutorial below so that you can make one of these cuties too!) Here's the first photo, which is a view of the lid:


The next photo is a side view:


And here are a couple of photos of the inside:


Here is a photo and list of the prize package that the winning entry will receive for this month's Scrap-It-Girl Challenge:


*Small square tag board flip album
*Candy tin
*3" x 3" kraft album with jute tie
*1" x 1" CTMH acrylic block
*3 CTMH mini ink pads in Sunflower, Garden Green and Hollyhock
*2 CTMH Petite Perks stamp sets: "Bee Yourself" and "Deck the Halls"
*1 sheet CTMH textured stickers
*1 CTMH Mini-Medley embellishments pack in black
*3 packs of Charmed I'm Sure stainless steel charms: "Camping", "Baby", and
"Harvest"
*1 varity pack of CTMH clear shapes
*1 bobbin of ribbon with "Memories" wording
*3 Tim Holtz clips
*1 pack mini mosaic tiles
*6 yellow vellum metal rimmed tags with yellow twine
*1 pack CTMH Foundry Tabs
*1 pack CTMH decorative metal tokens
*1 pack CTMH metal charms
*1 pack CTMH Blush/Chocolate Embellishments
*1 pack CTMH Tulip/White Daisey Embellishments
*1 pack CTMH Sweet Leaf/Colonial White Embellishments
*1 pack misc. embellishments

I'd LOVE to see what you come up with for this challenge...I'm always on the lookout for inspiration to make fun little crafty projects! The challenge rules are simple: create a project using a small package of some type - you could use tins, boxes, bottles, baskets, cans...whatever creative small package idea you may have!! You can link up to two projects HERE to be entered in this month's challenge...so why not make something and submit a project or two for a chance to win??

Alrighty...here's how I made Jamie's friendship mini tin album:

Begin by tracing around the top and bottom of your tin on a piece of fabric, (I chose denim chambray), and then cut the pieces out:


Put a coat of Mod-Podge on the top and bottom of the tin and place your fabric on top of it. Add a coat of Mod-Podge to the top of the fabric as well, and set tin aside to dry:


While the outside of the tin is drying, you can begin to work on the contents of the inside. Cut a piece of double-sided cardstock to fit the inside of your tin. My cardstock measures 11" long by 4 1/4" wide.


Score the cardstock, (on the long side), in 2" increments. This will leave a 1" tab at the end, which is what you will adhere to the inside back of your tin. Now turn the cardstock lengthwise and make a 3" score line all the way down from the short side. Cut notches from the edge to the short score mark...these flaps will form the pockets in your mini album and look like this:


Embellish your pocket fronts the way you want, and then adhere the sides down to form the pockets where the quote tags will be placed:


Once you've got your pockets embellished/in place, set accordion album aside and return to decorating the outside of your tin. I adhered a piece of twill ribbon to the edge of the bottom part of the tin. Once it dried, I added a narrow piece of red ric-rac on top of that for a little extra detail:


I then cut a piece of ruffled gingham ribbon and adhered it to the top edge of the lid portion of the tin:


Decorate the top of your tin as desired. I created a felt flower, (click HERE for my instructions for the flower), and then cut out fabric leaves as well. I added beads that spelled "friend", which I strung on a piece of knotted jute; and a brass tag that says "best", accenting the tag with coordinating ribbon:


When the top has dried, flip the tin over and use craft glue to attach 4 wooden beads to the bottom of the tin to create "legs":


Once you're tin is completely dry, and the legs are firmly set, you can attach the album to the inside. Begin by accordion folding your mini-album, leaving the 1" tab at the end. Using a strong adhesive, (I used Teriffically Tacky Tape), attach the 1" flap to the inside back of the tin:


Cut a 2 pieces of burlap...one to fit on the inside of the lid, and one for the inside of the bottom, and adhere using liquid glue. The 1" cardstock flap in the back will be covered up by the burlap. Set tin aside to allow the burlap to dry. While this is drying, prepare/cut out photos and print/cut out friendship quotes. (I Googled "friendship quotes" to find the ones that I used.)

That's it! Now your little tin is ready to give away or keep as a gift to yourself!

Have a blessed day!

Photobucket

Friday, June 29, 2012

Winner Announcement and a Couple of Cards...


Happy Friday, Peeps! Well, I used my uber-scientific method of random selection for the giveaway detailed at the end of my Craft Room Reveal post, (placing the number of comments in a bowl and drawing one out - LOL!!), and the winner is Deb Neerman who left comment # 1:


Congrats Deb, and thanks for the sweet comment!! Please email your mailing address to me and I will get the 3 issues of Simply Handmade in the mail to you ASAP!! Also, thanks to everyone who left a comment...I love reading what you have to say and appreciate you so much!! (Be sure to check my blog on Sunday for information on another giveaway!! I am the Design Team host for Scrap-It-Girl's July Challenge, "Good Things Come in Small Packages", so I will have a fun mini altered scrapbook tin tutorial to share with you as well as information on how you can enter to win the prize that will be given away!)

Earlier this week I attended a Stampin' Up! party at the home of my friend Pam W. The demonstrator, Kathy D., (who I go to church with!), had us make two really pretty cards, so I thought I'd share them with you today. I LOVE the clean/simple look of both cards, don't you??

The first one is a birthday card that I will give to my friend Robbi, who has a birthday on July 4th. (So, Robbi, if you are reading this post you now know what your card looks like - ha! ha!)


The second card is a thank you card...I really love the color combo on this one and the use of paper that looks like old book print:


Have a fun and safe weekend!

Photobucket

Thursday, June 28, 2012

At Last!! My Craft Room Reveal! (Oh, and a Giveaway too!!)


NOTE: This is a "sticky post" and will remain at the top of my blog through June 28th. Please scroll down to read newer posts - thanks!

Hi, All! This is a pretty lengthy post, but I finally finished redoing my craft room so thought I'd share the pictures with you today. Also, by simply leaving me a comment at the end of this post through June 28th, your name will be entered in a drawing to win the 3 issues of Simply Handmade shown in the photo at the end of this post. (It's one of my faaaaavorite crafty publications, and these issues are packed with lots and lots of great projects and inspiration!!) The winner's name will be drawn and posted on June 29th!

Anyhoo...let's get started with the craft room reveal! First off, here is a photo of the room as you enter through the door:


I just love vintage fabrics, and have several pieces, so that was the color inspiration that I used throughout the room...shades of red, aqua blues, greens and yellows. The table is topped with a vintage tablecloth that my mom gave me. (She has photos of me on my first birthday sitting in front of my birthday cake on her table topped with this very tablecloth!) Mike had a piece of glass cut for the tabletop to protect the cloth and give me a firm work area to work on my scrapbooks and paper craft projects, or to set up my sewing machine. (Trust me, my work area is rarely this clean...so I thought I'd better take a photo before it looks like a craft supply bomb went off in there - ha! ha! ha!)

I found the red chair cushions at Wal-Mart for only five bucks each, and I made the "CREATE" sign above my work table. The frame was on clearance at Hobby Lobby for only a buck - SCORE! - so I purchased some burlap and MDF wooden letters, (which were on sale!), and went to work. I started by painting the edges of the letters with black paint. I traced the letters onto some of my favorite retired CTMH designer paper, cut them out, and Mod-Podged the paper to the letters. Using spray adhesive on cardboard cut to fit the frame, I attached a piece of burlap. I then overlapped and staggered the letters and attached them to the burlap. TADAH - a cute and inexpensive sign...costing me only about ten dollars to make!

In previous posts I revealed that the old crates on the wall hold my stamp pads, acrylic stamps, button jars, acrylic blocks, etc. The cubby storage unit, which was a birthday present from my folks, houses all kinds of goodies such as jars of ribbon, some wood mounted stamps, cutting tools, Xyron machines and adhesive, spools of ribbon, etc. (Click HERE and HERE to see close-up photos from those posts.) On top of the cubby unit is my Cricut machine as well as a couple of cute and functional metal planters, which hold scissors, adhesive, rulers and other tools.

Here's a close-up photo of the corner shelf seen in the photo above:


My terrific father-in-law made this awesome corner shelf for me many years ago, and I just love it! The jars on the shelves, (which I purchased at Tuesday Morning for only three dollars each!), hold some more of my wood mounted stamps, lace, brads, and other miscellaneous embellishments. The old crock sitting on the floor was given to me by my mom as well, and I store rolls of kraft paper there. Throughout the room you'll see lots of vintage ladies handkerchiefs...all of them belonged to my grandmothers and Mike's Grandma Minnie. I just love the prints and colors of them, even though some of them are faded and worn from lots of use!

On top of the corner shelf, on either side of the geranium arrangement, you'll see more jars...yes, yes, I know...I have a "jar hoarding problem"! LOL!! Here's what they look like up close:


My mom found these jars with the unusual lids at a yard sale, and bought them for me. I think they are perfect for holding jute twine...and the lids make it easy to pull and cut off what I need when I'm crafting!

On the opposite side of the room, across from my work table, is a comfy chair and ottoman next to the window. (My dear friend, Linda H. gave these to me when she moved last fall and was down sizing - thanks Linda!!) I love sitting here working on needlecraft projects and reading! The pillow on the chair was crocheted by my Grandma Franklin, and she gave it to me several years ago. The long shelf on the wall was built by my father-in-law as well, and it holds some of my favorite little things. (My collection of Willow Tree figurines, my Grandma Franklin's old glasses, my Grandma Buckallew's old quilting thimbles and fabric tape measures, my silver baby spoons, an antique lock and key from my Grandpa Buckallew's workshop, etc.) The framed photos on the wall are some of my favorites of Justin when he was a little boy.

The old pottery bowl, sitting on the small stool next to the book shelf, holds my yarn, crochet and knitting needles. (For when I finally have time to teach myself how to crochet and knit - ha! ha!) The bowl belonged to Mike's grandmother and the little 3-legged milking stool was made by my father-in-law as a gift to Justin when he was just a toddler.


As you can see, my sweet little dog Tony likes to hang out with me in my craft room! Here are a couple more pics of Tony hanging out with me:


Such a silly dog...he likes to crawl under the ottoman and nap...here he's only half-way under it and doesn't think I can see him!


And here's my good boy posing for me...gosh I love this adorable little guy!! Anyhoo...moving on...


This book shelf was also given to me by my friend Linda H. when she down-sized, and it houses some of my scrapbooks and craft books, along with bins and baskets of more crafting supplies. The pretty apple plate displayed on the top shelf was given to me by my brother-in-law Don's mom, Opal, who was a painter. (She was such a lovely and talented lady!!) On the wall to the left of the book shelf are ribbon boards that I am always tucking pictures of friends and family and memorabilia into. It is one of those things that just makes me smile every time I look at it!

Behind my work table is the closet which houses more craft supplies. To the left of the closet is a basket tree that my father-in-law built for me too. (I am SO FORTUNATE to have a terrific father-in-law who likes to do woodworking projects and makes me things!!)


The little stool also used to belong to my friend Linda H., and I inherited it as well. It is the perfect place for my radio/cd player to sit, and I added a couple of cute vintage handkerchiefs to the top. I made the cross-stitched piece on the wall and gave it to Mike back in 1990...I just love those cute little bunnies and the 'Happiness Is' saying:


I haven't had time to finish cleaning out and organizing the closet where I keep more supplies, but I'm going to show you photos of it anyway! In the first photo you can see that I have several tilt bins hanging on one of the closet walls to hold small embellishments. I also keep my Cropper Hopper and some drawers full of supplies in there as well.


Here is a photo of additional drawers and shelves of supplies in the closet. Like I said, I am still working on/organizing the closet space, so it's not "perfect" yet!


Now for the giveaway information! If you leave a comment for me on this post, sharing your favorite craft or organizing tip, your name will go into a drawing to win these three issues of Simply Handmade. You have until June 28th to post your comment...please leave your contact information in the post as well, so that if your name is drawn I will know how to reach you! The winner's name will be posted on June 29th.


Thanks for taking the time to "tour" my craft room...I hope that some of the storage ideas that I shared will help you create a fun and functional space of your own!

Wishing you a blessed day!

Photobucket

Tuesday, June 26, 2012

Melissa's Great Summer Giveaway Info...

Good morning, Friends! You'll want to hop over to Creating from the Heart to check out the AWESOME summer giveaway from Melissa! You have until July 16th to register for these super goodies:

♥ We R Memory Keepers Lucky 8 Punch, Eternal Heart  
 ♥ Simple Stories Summer Fresh Collection
♥ Fancy Pants Time for Spring Kit
 

♥ Kaiser Craft The Lakehouse Clear Stamp
 
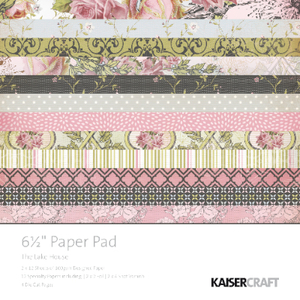
♥ Kaiser Craft The Lakehouse 6.5 x 6.5 Paper Pad


Click HERE for all of the giveaway details, and while you're visiting Melissa's blog, be sure to check out her BEAUTIFUL artwork...she makes the most stunning cards!!

Have a super day!
Photobucket

Friday, May 18, 2012

Kerr-afty Creations Giveaway

My blogging pal, Justine, is giving away the following goodies:
  • A super cute hand-stitched owl Iphone case 
  • A fat quarter of fabric
  • And a pretty pearl bracelet


Click HERE to go to Justine's blog and to find out the rules to enter the giveaway, which is open until May 22nd. While you visiting her blog, be sure to check out her other crafty posts...she is SUPER talented!! Good luck!!

Photobucket

Wednesday, May 9, 2012

Melissa's Fabulous Goodie Giveaway...

You definitely don't want to miss out on the wonderful giveaway from Melissa at Creating From the Heart. Melissa is SUPER talented...you'll want to check out her blog to be WOWED by her beautiful card creations!

Anyhoo...here's the incredible prize package that she's giving away:

Grand Calibur Machine by Spellbinders:


Grand Scalloped Circles Nestabilities:
Grand Labels Four Nestabilities:
6x6 Hello Summer Paper Pad by Echo Park:


 Hello Summer Chipboard Stickers by Echo Park:


240 Yard Spool of Pink Sorbet Bakers Twine:


 To enter you must do the following:

 ♥ Leave a comment on her blog post.

♥  Let her know how you will spread the word. Either put a link to her giveaway on your blog, on your Facebook page, by email, etc. She will check on this!

♥ And for a second chance, become her friend (follower)...and stick around!

 That's all you have to do! The giveaway will remain open until May 22nd, and the winner will be posted on her blog a day or two after that. Good luck everyone!

Photobucket