Wednesday, December 31, 2014

Happy New Year!


As we embark upon a new year, I thought this quote by Neil Gaiman was appropriate to share. I have always been a firm believer that a mistake isn't necessarily a bad thing if you learn and grow from it. Let's grow together in 2015...both in our successes and our mistakes!

Wishing you an AMAZING year full of adventures, new experiences, happiness, love and laughter!!

Blessings,
Photobucket

Tuesday, December 30, 2014

Sharing Some Christmas 2014 Photos...

Hi, all! I had every intention of getting these family Christmas pics posted yesterday, but time got away from me and it just didn't happen. Anyhoo...here are a few moments from our family Christmas 2014 celebration...

First off, here's a photo of my little family...left to right is my hubs Mike, me, my son's girlfriend Hailee and my son Justin:


Our Christmas celebration took place at the home of my brother-in-law (Don) and sister-in-law (Sandy); which is located just outside of Miami, OK. Here's a photo of them...they are such a sweet couple!


Here's Sandy with her grandson, Ian and daughter, Kari...I just love them bunches!


This is my beautiful sister-in-law, Lea Ann, who celebrated a birthday on Dec. 20th...


These two pretty gals are my niece Ashley and her little girl/my great-niece, Kayle Ann:


Justin and Hailee shared the big, comfy chair in Don and Sandy's living room...they're so cute! :)


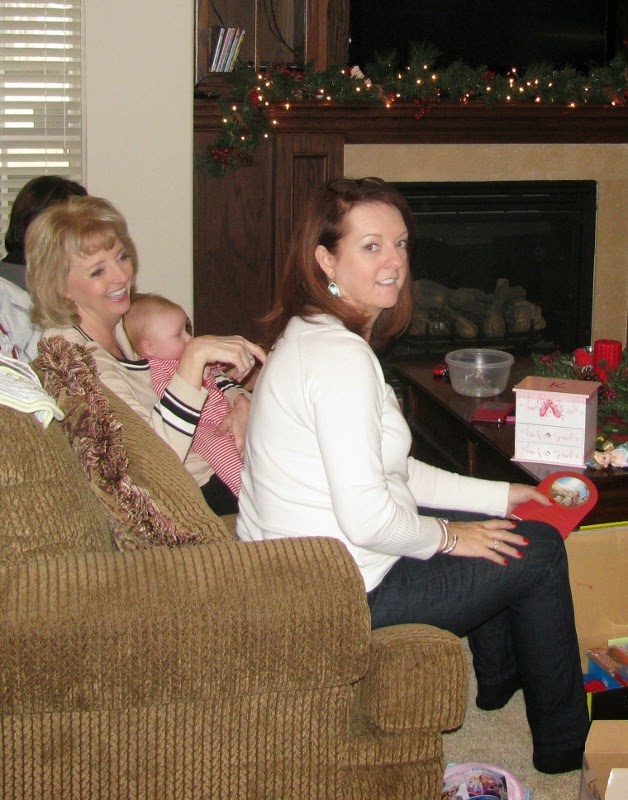
I was SUPER HAPPY to get some baby lovin' time with my new great-nephew, Henry, who was born in September...he's sooooo precious!!!


Here's a pic of Mike and his brother, Royce, sharing some funny stories from their childhood after our delicious "cowboy lunch", which consisted of BBQ pulled pork, chili, and all the fixin's and sides!


The kiddos had a great time opening their gifts! My 2 1/2 year old great-nephew Jack is a lover of all things train, so he was thrilled with his presents!


Lots of laughs were shared, especially while we played our annual "Brown Family Bingo Game"!


Here's a pic of my handsome nephew, Ryan...he is the son of my SIL Sandy, and the dad of Ian and Kayle Ann:


My SIL Sandy is a quilter, and makes BEAUTIFUL quilts throughout the year. Last year she added a new tradition to our "Brown Family Bingo Games", by giving away a Christmas quilt during the last round of Bingo. This year my nephew J.T. won a gorgeous Santa quilt made by Sandy - what a lucky guy!!


My BIL Don is quite a jokester, so I had to take a photo of the "gingerbread house" that he made...so silly!! ;)


In closing, from my family to yours, we wish you a wonderful new year filled with lots of happiness! May God bless you in all of your endeavors during 2015!


Happy New Year!!

Photobucket

Wednesday, December 24, 2014

Merry Christmas!


From our home to yours, we wish you a very Merry Christmas!

Blessings,
Photobucket

Monday, December 22, 2014

Personalized Food Carrier Tutorial

Good morning! Every year at this time my sweet hubby bakes his INCREDIBLY DELICIOUS chocolate chip cookies to share with family and friends. (Click HERE for his recipe.) Everyone looks forward to receiving his cookies, so for our friends the Milligan's and the Fitzpatrick's I decided to create personalized food carriers to present to them with his cookies:


These turned out so cute that I knew you'd want to know how I made them, so I decided to make a tutorial for you! Let's get started:

I purchased some clear, plastic, rectangular containers with handles at my local Dollar General store. (You can find these at about any department store in the home-wares section.)


After removing the labels, I hand-washed the containers in warm, soapy water and then thoroughly dried them. Using my computer, I found a nice font that I liked, sized it to fit across the top of the lid, and then printed the last name of the recipient:


Using Scotch tape, I centered the name on the inside of the lid and taped it down to temporarily hold it in place as a guide:


I bought a couple of black paint pens at Hobby Lobby to personalize the carriers. The paint can be used on any surface, is permanent and washable too, so I knew it would be perfect for this project!


Using the pattern that I taped to the lid as a guide, I traced the lettering with the paint pens. I then used a transparency from the CTMH "Playful Flourishes" stamp set as a guide to create swirly borders above and below the name.


By taping the transparency to the underside of the lid, I was able to use the flourish that I selected as a guide to trace with the paint pen. I just flipped/moved the transparency to create a mirror-reverse image for the border on each side of the lid:


After the paint had dried, I filled the containers with Mike's cookies and tied big red bows on the handles before giving them to the Milligan's and the Fitzpatrick's. Here's another look at the finished project...I LOVE, LOVE, LOVE how these turned out!! I'm definitely going to have to make one for myself too!!


If you're planning on giving away some yummy baked goodies, this is a great way to present your treats! You could any size/shape of storage container, and the recipient would be able to use the container long after your baked goodies have been gobbled up! :)

Wishing you a wonderful week as we prepare to celebrate Christmas!

Sending warm thoughts your way,

Photobucket

Saturday, December 20, 2014

Silly Saturday


Enjoy your weekend and be safe if you're doing some last minute Christmas shopping!

Photobucket

Wednesday, December 17, 2014

Chicken Wire Frame Photo Display Board Tutorial

Hi, friends! Today I want to show you a sweet memory board that I made for my friend and hair stylist, Diana M.:


I gave it to her last week when I was at the salon for my hair appointment, and she loved it! Let me show you how I made it, in case you'd like to make one for a friend or family member for Christmas:

I started out with a large frame that I purchased on sale at Hobby Lobby. The frame had some scratches on it, but that was just fine with me because I planned on distressing it anyway!


Here's a photo of the frame after being distressed with sandpaper:


My hubs then stapled chicken wire to the back of the frame while I went to work creating the tags to embellish the frame. I started out with white tags that I soaked in a mixture of coffee, vanilla and cinnamon. After they had thoroughly dried, I stamped the letters F A M I L Y on the tags with chocolate brown ink:


While in "stamping mode", I also used the chocolate brown ink to stamp flourishes and words on the clothespins that will hold the photos and memorabilia to the chicken wire:


Once the tags had dried, I tied them to a piece of jute twine that I attached to the top of the chicken wire on the frame. I then made a bow using some decorative burlap and lace wired ribbon that I picked up at Hobby Lobby. I stitched up a simple flower using torn muslin and a button, and then tied the flower to the center of the bow. I then glued it all to the corner of the frame using E6000 glue:


Here's another look at the finished product...I really LOVE how it all came together!!


Thanks for dropping by my blog today! Enjoy the rest of the week...we're halfway to the weekend! :)

Blessings,
Photobucket

Monday, December 15, 2014

A Recipe and a Book Recommendation...

Good morning and happy Monday, friends! I hope that you enjoyed a nice, relaxing weekend. We had an early Christmas get-together at our house on Saturday. My parents, Justin and his girlfriend Hailee came over for lunch and to open presents. We ate waaaaay too much and had a great time visiting. :)

Today I'm going to share with you a fabulous recipe for white bread/rolls that was given to me by my sweet friend Robbi R. With Christmas just a little over a week away, you might want to bake some of these tasty rolls up to serve with your holiday meal:


Ingredients:

  • 5 1/2 to 6 1/2 cups of flour
  • 2 packages of yeast
  • 2 teaspoons sugar
  • 1 Tablespoon salt
  • 1/4 cup soft butter
  • 2 1/4 cups very hot tap water
Method:
Combine 2 cups flour, sugar, salt and yeast together and blend well. Add butter and combine with flour mixture. Add hot tap water all at once. Mix at medium speed for 2 minutes. Add 1 cup of flour and beat on high for 1 minute. Add remaining flour and, with dough hook attachment on mixer, and combine until a soft dough forms. Knead for 5 to 10 minutes, cover with plastic wrap and towel. Allow dough to rest for 20 minutes and then punch it down. Shape into loaves or rolls and place in a greased pan. Rub surface with oil and cover loosely with plastic wrap. Refrigerate 2 to 48 hours and let stand for 10 minutes before baking at 400 degrees for 35 to 40 minutes or until a light golden brown. If you want to make the rolls immediately after rising, rather than refrigerating the dough for later use, then cut the baking time to 20 minutes at 400 degrees. Rub tops of bread or rolls with a stick of butter upon removing from the oven to keep them soft.

Serve warm with butter and/or Christmas jam. (Click HERE for Christmas jam recipe.)

Lastly, I want to share a Christmas book with you called Christmas Treasures of the Heart by Cheri Fuller. (Shown in the photo at the top of this post.) This is a wonderful little book chocked full of short stories and simple Christmas celebration ideas to inspire and enlighten you during this holiday season. My sweet sis-in-law, Lea Ann, gave me a signed copy of this book many years ago, and I re-read it and place it on my coffee table every year for visitors to look at if they want. I think you would enjoy this book as much as I do, and it makes a terrific little gift to share with teachers, friends, co-workers, neighbors, etc.

Have a blessed week!
Photobucket