Wednesday, January 28, 2015

Travel Tissue Holder Tutorial...

Hi, friends! Today I'm going to show you a quick project to teach kiddos how to make a running stitch and how to sew on a button! By whipping up a cute travel tissue holder out of a half-sheet of felt, they can create a fun and useful project:


Begin by gathering your materials...here's what you'll need:

  • 9" x 12" piece of patterned felt (Hobby Lobby sells LOTS of different designs of patterned felt, both girly and guy designs, for only $.50 a sheet)
  • Coordinating thread
  • Needle
  • Button
  • Pinking shears
  • Travel-sized package of tissue


Fold the felt in half and cut using pinking shears:


Cut the other long sides of the felt pieces with the pinking shears as well:


Lay the pack of tissues on the piece of felt and fold the sides over to "fit" the packet to the felt:


The felt will be longer that you'll need to cover the package, so trim approximately 1 3/4" off of the felt so that it ends up measuring 7 1/4" and there is a slight overlapping of the felt in the center:


Fold the cut felt around the tissue package to retro-fit the cover, remove the tissue and pin the ends in place:


Thread a needle with a coordinating color thread and using a running stitch, sew the ends closed:


For decorative purposes, you can sew a little button to the center of the top flap of the tissue pouch:


Tuck your tissue packet into the cute little pouch that you just stitched up and toss it in your purse or backpack! These would be fun to give to co-workers/schoolmates, friends, aunts/grandmothers, teachers, etc. (Oh, and your kiddo will be so proud to tell the recipient that they made it them-self!)


Thanks for dropping by today! I hope that you have a TERRIFIC week!

Photobucket

Monday, January 26, 2015

Recipe of the Week: Detox Bath Concoction

Good morning! Last week was kind of a bust as I came down sick with acute bronchitis and had to go to the doctor. Upon arriving at the doctor's office, they immediately made me put on a mask since they didn't know if I had the flu or another virus. (Thankfully, my flu test came back negative!)


While sitting in the patient room waiting for my flu test results, I snapped a photo of this cool quote canvas that was hanging on the wall...love it!


After the doctor diagnosed me with acute bronchitis, he said that it could either be bacterial or viral, so in the event it was bacterial, he prescribed a "Z-Pack". I ran a fever of over 101 degrees for 3 days, even with taking the antibiotic, so I am going to take an educated guess that it's viral and will have to run it's course.

On Wednesday, after missing 2 days of work - UGH! - and still running a fever, I decided to Google recipes for a detox bath in hopes that it might help me get rid of the persistent fever and aches that I was being plagued with. I came across a recipe at the Bewitchin' Kitchen Blog that I tried, and it really seemed to help! After soaking in the detox bath for 30 minutes on Wednesday afternoon, my fever broke and didn't return - yippee!! I was able to return to work on Thursday, and although I am still coughing like an asthmatic sea lion, I am feeling much better! Anyhoo...since the flu and other nasty viruses are going around, I wanted to share the detox bath recipe with you in hopes that it will help you like it helped me. :)


Ingredients:

  • 2 cups Epsom salts (can be purchased at any pharmacy and are very inexpensive)
  • 1 cup baking soda
  • 2 Tablespoons ground ginger
Method:
In a mixing bowl combine ingredients. Run a bathtub of water as hot as you can stand it and pour detox ingredients into the running water so that they can dissolve. Climb into the bath and soak for 30 to 40 minutes. (I read my new issue of Country Sampler Magazine while soaking...LOVE that magazine!!) Oh! Bring a bottle of cold water with you when you're soaking because you'll get unbelievably thirsty! 

Once you get out of the bath and dry off, put on a clean pair of PJs and curl up in a quilt in your favorite chair...I started sweating so much and was SUPER thirsty due to my fever breaking, which was a welcome sign after having a fever for 3 days.

Wishing you good health!!

Blessings, 

Photobucket

Saturday, January 24, 2015

Monday, January 19, 2015

Photo Tile Tutorial...

Hi, folks! Through the years I've made several photo tiles for friends and family members, but I've never posted a tutorial on how I create them. Well, today is the day to finally post a "how-to" so you can make some for the special people in your life too! (These make TERRIFIC wedding, anniversary, graduation and baby gifts!)

The tutorial that I'm showing you is for the tile that I made for my friend Amy, who celebrated a birthday yesterday:


I decided to try something new on Amy's tile by adding a rolled burlap flower with a button center, a distressed paper doily and a couple of little keys to the lower left corner for a little added "foo-foo". I really like how it came together and I'm excited to give the tile to her later this morning!

Let me show you how I made it:

First off, gather your materials. You'll need the following:

  • 6" x 6" tumbled marble tile from your local home improvement center
  • Mod Podge
  • Computer and color printer
  • Photograph
  • Cardstock
  • White tissue paper
  • Sponge brush
  • Disposable plastic container
  • Scotch tape
  • Rubber stamps
  • Brown Staz-On ink
  • Paper doily that's been tea-dyed/torn/distressed
  • Rolled burlap flower and fabric leaves
  • Button
  • Little keys (I found these in the jewelry making section at Hobby Lobby)
  • Alene's Quick Dry Tacky Glue
  • Terrifically Tacky Tape
  • A piece of cardboard to protect your work space
  • Metal stand (can be purchased at Hobby Lobby or Michael's)
Begin by scanning the photograph that you want use into your computer. Cut a piece of white tissue paper just slightly smaller than the size of a piece of copy paper and tape the edges down using Scotch tape:


Print the photo on the tissue side of the paper and set aside. Wipe off the tile with a damp paper towel to remove any dust from it:


Carefully tear away the tissue paper photo from the copy paper. Now the fun begins!! Gather your tile, Mod Podge, sponge brush, photo and plastic container. (I washout and save pudding and Jell-O containers for projects such as this...it's a great way to recycle!)


Pour some Mod Podge into the plastic cup. Using the sponge brush, apply an even layer of Mod Podge to the tile:


Carefully place the torn tissue photo in the center of the tile, smoothing from the center outward with your fingers to remove any air bubbles. Coat over the photo with an additional layer of Mod Podge and set the tile aside to thoroughly dry:


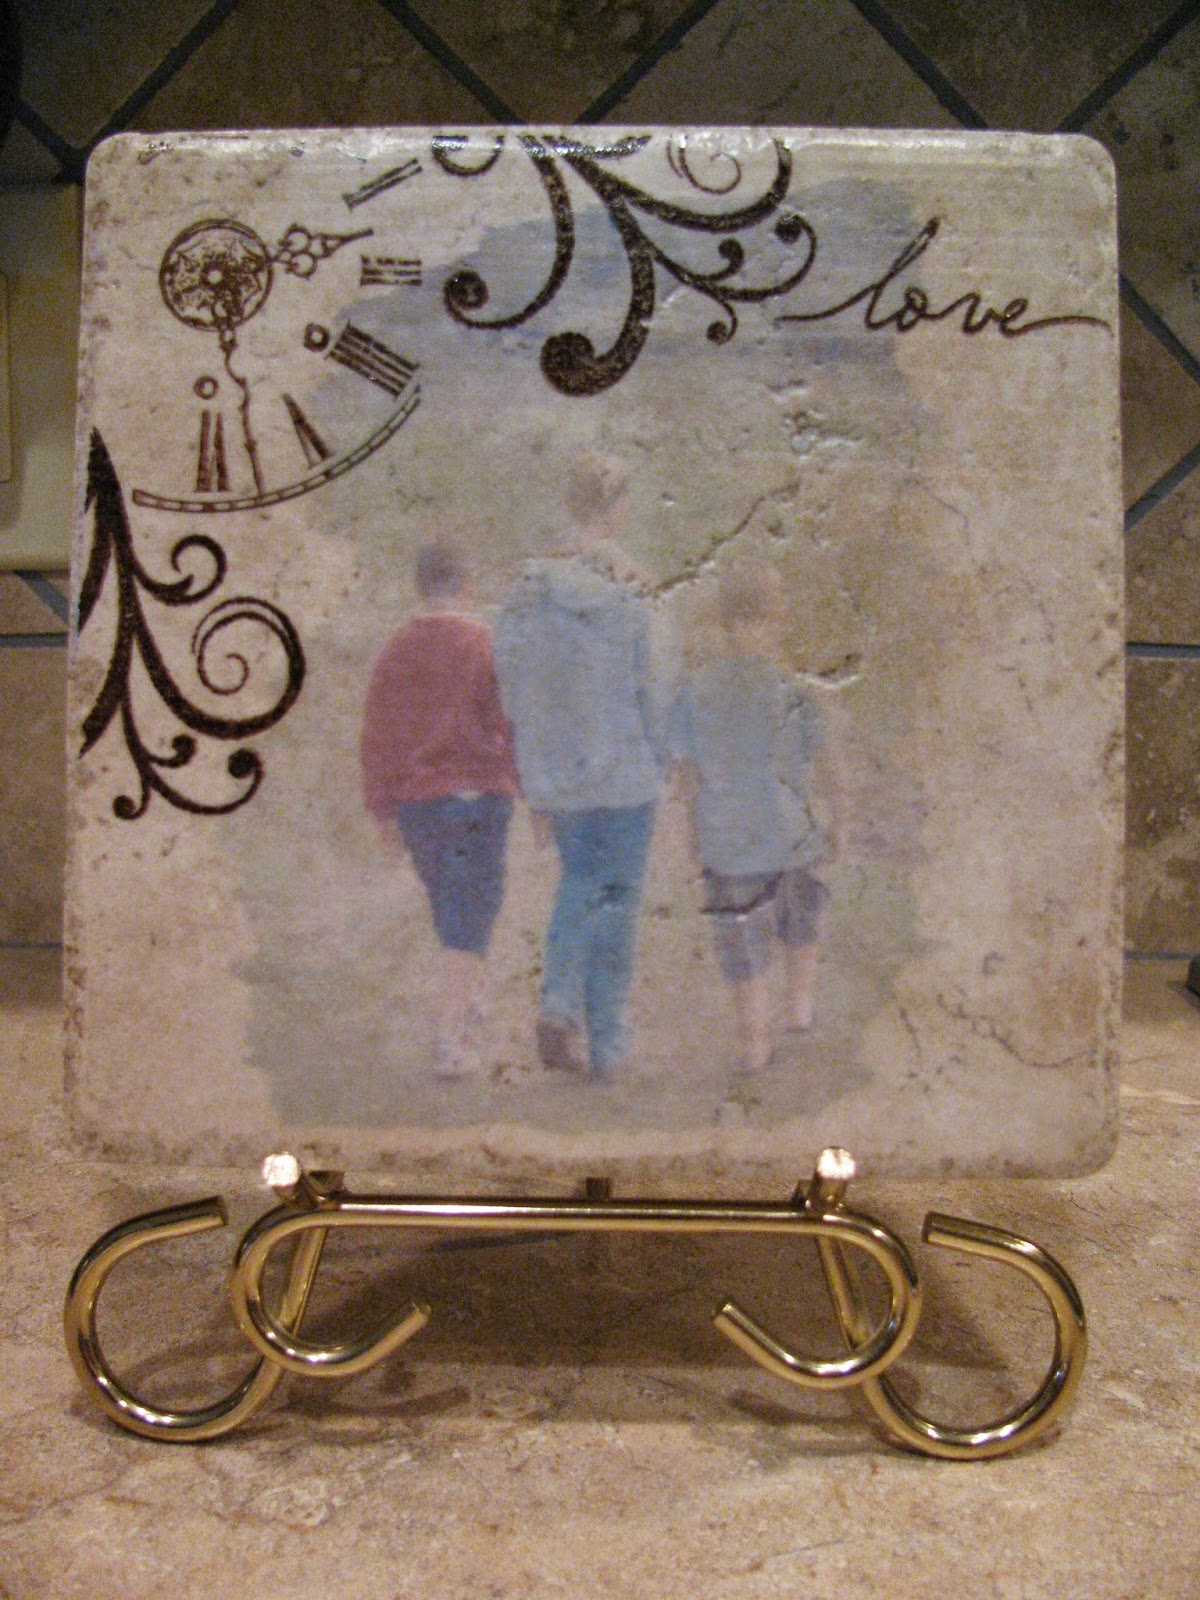
Once dry, you can add any decorations that you desire! I used brown Staz-On ink and some of my Close To My Heart acrylic stamps on Amy's tile. I then distressed and tore a paper doily and applied it to the lower left corner of the tile with Mod Podge as well. I allowed a few crinkles in the doily when I adhered it to the tile to add to the aged/vintage look that I was going for:


Once the doily was dry, I added an aged burlap flower, button, leaves and keys to the top of the doily with Alene's Quick Dry Tacky Glue:


To give the backside of the tile a finished look, I printed my name and blog address on a piece of cardstock that matched the tile and adhered it to the back using Terrifically Tacky Tape:


Here's another peek at the finished tile:


Lastly, to give you some more ideas, here are some pics of a few of the tiles that I've made through the years...


I think it's so cool how they all turn out so unique due to the crevices and specific features of each tile! Thanks for dropping by today...have a FANTASTIC week!
Photobucket

Wednesday, January 14, 2015

Monogrammed Frame Message Board...

Good evening! We're half-way to the weekend, friends - WOOHOO!! As I promised you a couple of days ago, here's the message board that I made for my friend/co-worker Christi W.'s birthday:


I think it turned out super cute! Here's how I made it:

I started out with a blue painted frame that I picked up at one of our local craft/antique malls. My sweetie stapled a piece of chicken wire to the back of the frame and added a couple of saw-tooth hangers, too. I found a piece of polka-dot scrapbook paper that coordinated with the color of the frame, which I used to cover a wooden "W" and some clothespins.


Before adhering the paper to the wooden "W" with Mod Podge, I painted the outside edges of the "W" black to give it a finished look. After the "W" had dried, I sanded the edges and then added a coordinating bow and button:


I applied the same paper to wooden clothespins with Mod Podge, sanding the edges after the Mod Podge dried:


I attached the "W" to the corner of the frame with E-6000. Here's another photo of the finished project:


I hope that the rest of your week is terrific! We're supposed to have sunny skies and temps in the 50's, which will be a really nice change from the cold fronts that have settled over Oklahoma during the past few weeks!

Blessings,
Photobucket