Tuesday, November 30, 2010

A Freebie!! Check it out..Lettering Delights Free Fonts!

Since we had to purchase a new computer, (because our old one crashed!), I've been trying to rebuild my font collection. While doing that, I came across an offer to get FREE fonts at Lettering Delights, so I just wanted to share the link with you so you too can have these cute fonts! All you have to do is click here:

Lettering DelightsFree Fonts

You'll receive 9 super cute free fonts when you sign up to receive their newsletter, which includes notifications about upcoming specials and additional free fonts! How can you go wrong with that?!?!

Enjoy!
Photobucket

Friday, November 26, 2010

Recipe of the Week....Sweet Potato Pound Cake


I hope you all had a WONDERFUL Thanksgiving! We drove to Edmond to spend Thanksgiving day with Mike's sister, Lea Ann, and her family and had a terrific time! Lea Ann and her hubby John are incredible cooks and hosts...they always make everyone that visits their beautiful home feel so welcome and loved. (Thanks, John & Lea Ann for your hospitality...love you guys!!)

One of the dishes that I took to John & Lea Ann's was a sweet potato pound cake. I found the recipe in the November issue of Country Living, a magazine that I just love!! I thought I'd try it out on the Thanksgiving crowd to see if it passed the taste test for my blog....and, since I'm posting the recipe, you know that it did pass the test - ha! ha!

Ingredients:
  • 3 cups all-purpose flour
  • 2 teaspoons baking powder
  • 2 teaspoons ground cinnamon
  • 1 teaspoon ground nutmeg
  • 1/2 teaspoon baking soda
  • 1/4 teaspoon salt
  • 2 sticks unsalted butter, softened
  • 1 1/2 cups granulated sugar
  • 1/2 cup packed light-brown sugar
  • 1 teaspoon vanilla extract
  • 2 cups leftover mashed sweet potatoes (or a 40 oz. can of sweet potatoes, drained and mashed, which is what I used)
  • 4 large eggs, at room temperature
  • 3/4 cup chopped pecans
Method:
Preheat oven to 325 degrees. Grease two 9" loaf pans with baking spray. In a medium bowl sift next six ingredients. (NOTE: I was in a hurry and didn't sift and it turned out fine!)

In a large bowl, using an electric mixer on medium, cream butter, sugars, and vanilla until light and fluffy. Blend in mashed sweet potatoes, then eggs, one at a time. With a mixer on low, add flour mixture in thirds; combine just enough to blend.

Spoon batter evenly into prepared pans. Sprinkle pecans over batter. Bake until cakes test clean when a skewer is inserted into centers, 70 to 80 minutes. Cool in pans on a wire rack for 15 minutes. Remove from pans and continue to cool completely on wire rack. Slice and enjoy!!!  YIELD: 2 loaves

Here are a couple of suggestions that came from my "taste testers":

Megan, (my niece), and her sweet boyfriend, JT said: "It tastes good, but we like more spices, so you could add more cinnamon and nutmeg".

Roberta, (my brother-in-law John's mom), said: "Use more nuts...add them to the batter too".

And there you have it...a great recipe to re-use leftover sweet potatoes! Have a fun and safe "Black Friday" shopping day, but don't get too carried away and end up having to pay for your purchases all year long - ha! ha!

Blessings,
Photobucket

Thursday, November 25, 2010

Happy Thanksgiving!!


I am so very thankful for the many blessings that fill my life, and just wanted to take a quick moment to let you know how thankful I am for YOU! Thank you for taking the time to read my thoughts/musings and for the kind comments and encouragement that you share with me.

Wishing you a joyful Thanksgiving and a heart filled with peace and gratefulness!

God Bless!!
Photobucket

Wednesday, November 24, 2010

How Fun!! A Blog Award!!


My blogging friend, Justine at Kerr-afty Creations, made my day by sending me this blog award...thanks a bunch, Justine!! (Be sure to click on Justine's link above to check out her super-cute and crafty blog...you'll love it!!)  Upon accepting this award I must following these guidelines:

1. Thank and link back to the person who awarded you this

2. Share 8 things about yourself

3. Pay it forward to 8 bloggers that you have recently discovered

4. Contact those bloggers and tell them about their awards

Now for some little known, (and not so little known - ha!), facts about me:

1. The one food that I absolutely loathe is black-eyed peas...just the smell of them gags me!
2. I am a very task-oriented person, so I make lists...lots and lots of lists - ha! ha!
3. I collect quotes
4. I am of German-Irish heritage
5. I love to cook but I don't like going to the grocery store
6. My family is my joy!
7. The one thing I am terrified of is snakes! They totally creep me out!
8. I am currently reading/studying 1 Kings in the Bible...and wondering how on earth King Solomon kept up with having 700 wives and 300 concubines?!?!?! Holy cats!!!

Here are 8 terrific blogs, (in no particular order!), that you won't want to miss checking out:

1. All Things Crafty
2. Margo's Garden
3. The Stamper's Cottage
4. Jessica's Paper Petals
5. Glitterbabe
6. Crafty Girl
7. Happy Scrapin'-n-Stampin'
8. Creating with Kari

Have a blessed day!
Photobucket

Tuesday, November 23, 2010

A little something that makes me smile every day at work....very special hand-made cards


As some of you know, I work in the Special Services Department of our school district's Education Service Center. Our department, along with the staff at our multiple school sites, works very hard to meet the educational needs of the special needs children in our community.

On some days, (okay, most days - ha!) our jobs at Special Services can get a little crazy and hectic, but we love it none the less because we know that we're working for the greater good for kids!

The photo above is of the bulletin board just outside my office door; and the artwork you see posted there comes from the intellectually disabled students at our senior high school. You see, at the beginning of this school year our department was instrumental in creating a living skills classroom for these kiddos. This fantastic classroom comes complete with a full kitchen, a laundry area, etc. The amazing teachers at our high school work with the students in this special room to teach them life skills...how to do laundry, prepare various meals, etc. How cool is that?!?!? Anyway, back to the artwork...the ID students created these hand-made cards for our department to thank us for providing them with the new living skills classroom. Don't you just LOVE their drawings and heartfelt sentiments? I sure do! I also love being able to look up from my desk and see this display...it puts a big smile on my face each and every time I look at it!!

Blessings,
Photobucket

Sunday, November 21, 2010

Scrapbook Page of the Week..."Joy Forever"

Our computer crashed last week so I haven't been able to post for a few days. We borrowed a laptop just to check our email while we were without a home computer, so I'm happy to announce that we purchased a new computer today!! WOO HOO!!
Now, on to fun things! This week's scrapbook page of the week uses a photo of my grandparents on their 50th wedding anniversary. (This is the photo a I posted a while back as one of my all-time favorites!) They're both gone now, and I really miss them!


I started out with a piece of black CTMH cardstock as the base. I cut a strip of Desert Sand cardstock 4" wide x 12" long and random stamped leaves and swirls on it. I adhered this strip of cardstock to the left side of the black background cardstock.

I then cut a piece of double-sided scrapbook paper which measured 8" wide x 10" long. I folded down the corner of the top right edge of the paper and attached a gold fleur de leis brad. I adhered the paper to the black cardstock, butting the edge against the random stamped cardstock strip on the left side of the page.

Using Glue Dots, I attached a piece of 3/4" wide stitched grosgrain ribbon over the right edge of the random stamped piece of cardstock, folded the edges under the black cardstock and secured with an additional Glue Dot on each end.

I matted the 4" x 6" photo with a piece of 4 1/2" x 6 1/2" piece of cardstock, and then matted that with another piece of cardstock that measured 5" x 7". I then adhered the photo, as shown above, to the page, slightly off center. I then attached 4 gold brads to the ribbon, two on either side of the matted photo.

Using the CTMH "Joy Forever" stamp set, I stamped 6 flowers, 5 leaves, and one sentiment. I cut out all of the elements and then used 3-dimensional dots to add depth to the sentiment and also to the flowers that I layered. I added a little bling to the flowers by applying a sparkle to the center of each one.


Happy  Scrappin'!!
Photobucket

Wednesday, November 17, 2010

Recipe of the Week...Easy Apple Spice Cake with Cream Cheese Frosting


Our computer crashed this morning, (BUMMER!), so I'm working on a borrowed laptop this evening so that I can check my email and post the "Recipe of the Week". Our techno friend, Sharon, came by this evening to help us diagnose the problem, (thanks, Sharon...you're our hero!!), and we're pretty sure that the hard drive is dead - UGH! We're trying to decide if it would be best to just replace the hard drive or break down and buy a whole new CPU, so I'm going to be without a home computer for a few days until we decide what to do.

Now for this week's recipe...I served this yummy apple spice cake last Saturday to the ladies that attended my Christmas card workshop and they loved it! I promised them that I would post the recipe for them this week so that they could make it too. This cake is scrumptiously moist and can be served with or without frosting...it's delicious either way!

CAKE INGREDIENTS:
  • 1 package spice cake mix
  • 1 can apple pie filling
  • 2 eggs
  • 1 Tablespoon vegetable oil
  • 1/2 cup chopped pecans, if desired
METHOD:
Add all ingredients to a mixing bowl. Beat together until combined. Pour into a greased pan. (A 9" x 13" pan can be used, but I tried something different and used a Bundt pan this time and liked the results!) Bake at 350 degrees for 30 to 40 minutes, (depending on what kind of pan you use!). Cake is done when a cake tester inserted in the middle comes out clean. If using a Bundt pan, allow cake to cool for 5 to 10 minutes in the pan, then turn out onto a cooling rack to completely cool before frosting.

CREAM CHEESE FROSTING INGREDIENTS:
NOTE: this is the amount of ingredients that I used to frost the Bundt cake, so you might want to double the recipe for a 9" x 13" cake...
  • 4 oz. cream cheese, softened (I used low-fat cream cheese)
  • 3 Tablespoons butter or margarine, softened
  • 1 teaspoon vanilla
  • 1 1/4 cups powdered sugar
METHOD:
Using an electric mixer, cream together cream cheese, butter and vanilla until fluffy. Gradually add powdered sugar and beat until combined. At this point, you can either spread the frosting on the Bundt cake or you can make a "swirly" design by piping it on. Once frosted, you can sprinkle chopped pecans on top of the frosting if desired.  ENJOY!

Cake can be covered and stored at room temperature.

Have a blessed day!
Photobucket

Monday, November 15, 2010

Fall Photos of My Little World

It seems as though it's taken FOREVER for the foliage on the trees to begin to change into their incredibly vibrant colors! We've had a very dry fall here in Oklahoma, so some trees didn't turn their pretty colors at all...so sad! Last week I took some photos of the beautiful fall colors that I see around my little world every day, so I thought I'd share those with you. All of the photos were taken in my yard except for the first one of a tree at the office where I work....

I captured this photo looking up into the tree that is just outside of the office building that I work in. I love the way that the morning sun enhanced the amazing firey red-orange color of the leaves against the crisp blue Oklahoma sky. I'm glad that I snapped the photo when I did, because as of today all of the leaves are gone:


Here's a photo of my front flower bed...full of pumpkins, mums and pansies. Once again, loving the way that the morning sun highlights the vibrant colors:


Here are a couple of photos to highlight the beautiful yellow mums and pansies...see why yellow is my favorite color?!?!?


At the time I took this photo, it wasn't quite cold enough to get a photo of "frost on the pumpkins", but the next best thing is a photo of "dew on the pumpkins", right?


Some richly colored crimson mums highlighted by more yellow pansies, which are planted around my brick mailbox:


And, last but not least, just a cute/happy little corner of my back yard...complete with decorative birdhouses, holly, golden euanymous (? spelling ?), and more yellow mums and pansies:


Wishing you a very happy day...be sure to look around your little world and give thanks for lovely things that you see every day too!
Photobucket

Sunday, November 14, 2010

Memory Box and Accordion Album

One of the ladies that attends my monthly craft/scrapbooking workshops recently commissioned me to make a memory box and accordion album for her daughter for Christmas. The set commemmorates her daughter's prom last spring, and she gave me several photos of the occasion to work with. The colors of the prom were red, black, and white; and the theme of the prom was "A Red Carpet Affair". Here's what I came up with...

The set:


The top of the box:


The front of the box:


The side of the box:


The back of the box:


The inside of the box:


The inside of the box lid:


The album resting in the memory box:


The cover of the accordion album:


Page 1, which includes two journaling tags:
Page 2 which also includes a journaling tag:

Page 3 - cover of mini flap album:


Open view of first two pages of the mini flap album, which includes two journaling tags:


Page 2 of the mini flap album:


Page 4:
Page 5:


Page 6:


Back cover of album:

The journaling on the tag is the lyrics from Bob Dylan's song "Forever Young":

May God bless and keep you always
May your wishes all come true
May you always do for others
And let others do for you
May you build a ladder to the stars
And climb on every rung
May you stay forever young
Forever young, forever young
May you stay forever young.

May you grow up to be righteous
May you grow up to be true
May you always know the truth
And see the lights surrounding you
May you always be courageous
Stand upright and be strong
May you stay forever young
Forever young, forever young
May you stay forever young.

May your hands always be busy
May your feet always be swift
May you have a strong foundation
When the winds of changes shift
May your heart always be joyful
And may your song always be sung
May you stay forever young
Forever young, forever young
May you stay forever young.

Happy Scrappin'!
Photobucket

Saturday, November 13, 2010

UPDATE: The Winner Is.....


Congratulations, Ann Marie!! My husband drew your name out of a hat to win the "Random Things" suitcase tin kit! Please email your mailing address to me and I'll put your kit in the mail on Monday!

Have a blessed day!
Photobucket

Friday, November 12, 2010

"Random Things About Me" Suitcase Tin & Mini Tag Book Tutorial...Plus A Giveaway!!!

NOTE: This is a "sticky post" and will remain at the top of my blog page until the end date of the giveaway detailed below. Please scroll down to read newer blog posts - thanks!

Are you getting tired of seeing altered tins?!?!? I hope not, because I never seem to tire at how I can transform something that would usually be tossed out into a craft project! But, just in case you are tiring of altered tins, this will be the last one that I post for a little while!

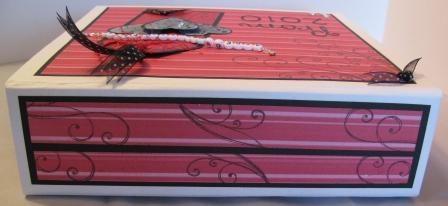
As I promised a couple of weeks ago, here are close-up photos and the instructions to create a really fun little suitecase-style tin which houses a mini tag book in which you journal random facts about yourself. I've also included a printable journaling prompt sheet so you can easily make your very own mini-tag book!

Here's a photo of the set:


To begin you'll need a mint tin, (mine measures 3 3/4" x 2 3/8" x 3/4"). You can recycle an Altoids mint tin if you like, or you can order plain, unused mint tins from Joann.com, Creativexpress.com or Orientaltrading.com.


The first step is to cut your paper for the outside of the tin slightly larger than the tin itself. (I used paper from the CTMH "Splendor" paper pack). Coat the top of the lid with Zig Two-Way Glue and ahere the paper you've prepared to the lid. Repeat steps on the bottom of the tin and set aside to dry.


Once glue is dry, use a sanding block and gently sand the edges of the paper so that it is flush with the edges of the tin. This gives a nice, finished look to your little "suitcase".

Cut two, 9" pieces of 3/8" grosgrain ribbon for the handles. Fold a 1/2" under on each end, to prevent fraying. Using a paper-piercing tool, pierce a hole through the folded ends and secure with a brad.

Using Terrifically Tacky Tape apply the ribbon to the outside of the tin, aligning the ribbon evenly on each side of the tin, as shown here:


Measure the outside rims of the tin and cut two strips of coordinating paper to adhere to the rims. (I ran these narrow strips through my Xyron machine, using repositionable adhesive, to make it easy to apply).


Next, cut coordinating paper to fit the inside of the lid and base of the tin. Using more Two-Way Glue, apply the paper to the inside of the tin and set aside to dry:

Now you're ready to make the mini tag book! Begin by cutting 11 pieces of white cardstock into rectangles that measure 3 1/4" x 1 3/4". This will give you 22 front/back pages to work with. Cut 12 pieces of coordinating paper 3 1/4" x 1 3/4" and set aside. Cut 10 pieces of double-sided coordinating paper 5" x 1 3/4".


Adhere all of the patterned papers to the cardstock bases to form the individual pages of the mini tag book. Fold the bottoms of the 5" long pieces of paper up by 1 3/4" to form pockets. Place a thin line of adhesive only on the sides of the folded parts of the pockets to secure, as shown in the next photo:


A photo, stamped image or favorite quote/Bible verse may be placed on the front of each of the pockets as embellishments. Journaling tags slide inside each of the pockets for additional random information about yourself! Here is a printable sheet of the journaling prompts that I created and used in my mini tag book...just click on the image to print a full-sized version:

If desired, the edges of the tag book and journaling prompts may be inked to give a distressed/aged look.

Cut coordinating ribbon to tie on a binder ring, which is what will hold your mini tag book together:


Using a Crop-A-Dile, punch holes in the upper left corner of the pages of the mini tag book. Place binder ring through the holes and tie coordinating ribbon to the binder ring. Now your mini-tag book is complete and ready to be neatly housed in the cute litte suitcase tin!


Now, just for fun, I'm giving away one of the workshop kits that I put together to create one of these cuties! The kit includes everything that you'll need to make this project, except the adhesive!


Here's all you have to do to enter to win this fun little kit:

1.) Post a link to my giveaway in an entry on your blog; then directly link up your post with the linky tool below. (It's my first time to use a linky tool, so I'm keeping my fingers crossed that it works!)

2.) Sign up to be a follower, if you haven't already done so.

3.) If you enjoy reading my blog, please grab my "Scrappin' Becky B." button, which is located under my profile in the sidebar on the right, and add it to your blog.

4.) Leave a comment on this post, with the direct link address to your blog where you've posted about my giveaway.

That's it, folks! A winner will be randomly selected on November 12th and the winner's name will be posted on my blog on November 13th. Be sure to check back to see if you've won! 

Happy Scrappin'!!

Photobucket