
.jpg)
I designed the pattern for this bunny to be printed on a standard sheet of 8 1/2" x 11" sheet of paper. You can click on the pattern below to print it out:
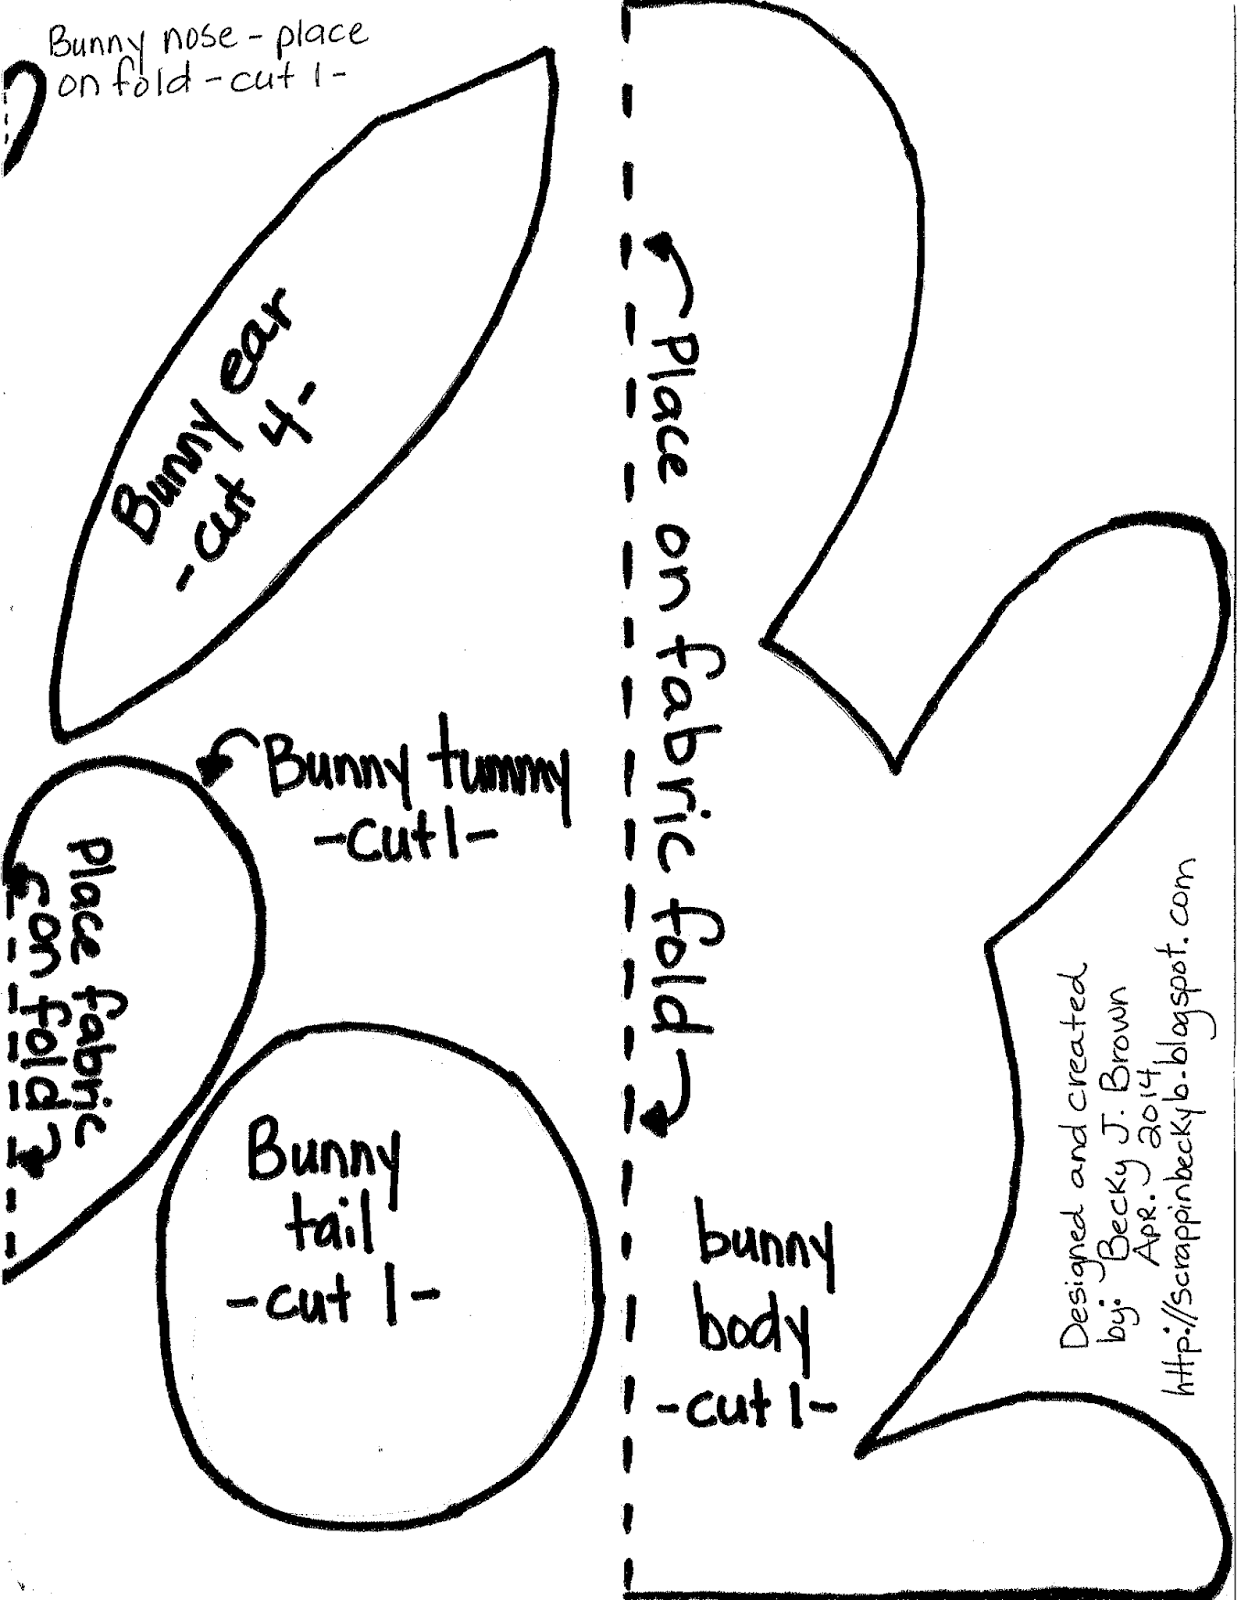
Once you've printed the pattern, select the fabric that you'd like to use. I chose two different fleece fabrics. Cut the pieces out, adding a 1/4" seam allowance:
.jpg)
Using a blanket stitch, attach the heart to the "tummy" of the bunny body:
.jpg)
Next you need to create the bunny tail by sewing a running stitch around the outside edge of the circle. Stuff the circle with fiberfill and gather the fabric around the fiberfill to form the tail. Firmly stitch the tail to the backside of the bunny body:
.jpg)
Using a blanket stitch, sew the tiny heart-shaped nose to the face of the bunny. Stitch a mouth too! Firmly stitch buttons for the eyes. If this bunny is being made for a small child, you can stitch felt circles for the eyes. If you do choose to use buttons, please be sure to stitch them FIRMLY to the fabric so that little fingers cannot pull them off and possibly choke on them!
.jpg)
Place the right sides together on the bunny ears, (I used a pink polka-dot fabric for the inside of the ears), and stitch the ears together leaving an opening at the ends that will attach to the bunny head. Carefully turn the ears so that the right sides of the fabric now show. Pin the ears to the bunny head and stitch them down:
+(2).jpg)
Pin the bunny body front to the back, with the right sides of the fabric against each other. Carefully tuck the ears into the body so that you don't catch them in your sewing machine while you are stitching the body together. (This is actually the hardest part of making the bunny! I folded up the ears and tucked them against the face so that they didn't get caught up in the outer seams.) Sew around the body of the bunny, leaving an opening at the base, (feet area), to turn it right side out. Once you've turned the bunny, stuff it firmly with fiberfill and sew the bottom closed. Tie a pretty ribbon around the bunny's neck and you'll have a cute little critter that looks like this:

Now for the SUPER fun part of this project...giving it to a sweet little kiddo!! Here is a photo of me giving the bunny to Jamie's granddaughter, Kastin...isn't she just the CUUUUUTEST baby girl??? :)
.jpg)
Thanks for dropping by today...I hope that you enjoy this pattern and tutorial! This project is a great way to use up scraps of fleece that you may have in your fabric stash.
Wishing you a GREAT day, friends!

No comments:
Post a Comment
Thanks so much for leaving a comment; I truly value your thoughts, ideas and opinions! Have a blessed day! Becky B.