Saturday, April 20, 2013

Monday, April 15, 2013

Milligan Family Shadow Box


As you know, one of my favorite crafty projects to make is shadow/memory boxes, so I thought I'd share a photo with you today of the most recent one that I created for my pal Jamie. The backdrop is simply two pieces of scrapbook paper, which I attached to the back of the frame. I separated the two paper designs with a piece of twill ribbon that has the words "relations", "family", "dearest", "kin" and "home" stamped on it. I attached a photo of her family onto a frayed piece of burlap, which is the focal point of the shadow box. Since she and her hubby Dustin have 4 children between them, I incorporated a little bird nest and 4 eggs that I found in the floral department of Hobby Lobby. The eggs were originally brown, so I painted them blue-green and used and old toothbrush to speckle the eggs with dark brown paint. The bird nest rests on a piece of a branch that I took from a tree in our yard; and I used a heavy-duty liquid adhesive to hold it in place. I tucked a couple of silk leaf sprigs under the nest to complete the "tree branch look" that I was going for. The quote on the tag, by T.S. Eliot, says "Home is where one starts from", which I thought complemented the photo perfectly since it was taken on Dustin and Jamie's front porch. I covered a small, wooden letter "M", (their last name is Milligan), in a coordinating paper and inked the edges in brown to give it an aged look. To finish it all off, I used a 10" x 13" barn wood shadow box frame that I purchased at Hobby Lobby. (If you watch their sales, you can get these for 50% off, which is a real steal!)

That's it, folks! Another fun and pretty shadow box completed!

Wishing you a blessed day,

Photobucket

Saturday, April 13, 2013

Wednesday, April 10, 2013

Time to Heal those Cracked Feet!


With warmer weather fast approaching, ladies, it's time to get those dry feet ready for sandal season!! I recently whipped up a batch of Miraculous Moisturizing Foot Cream for myself and to share with my friends. Now our feet will be soft and pretty in those cute sandals and flip-flops that we'll be wearing! It's super easy to make, so here's the link to my previous post where I shared the recipe:
http://scrappinbeckyb.blogspot.com/2011/05/recipe-of-weekmiraculous-moisturizing.html.

You can put the cream in cute jars purchased from Hobby Lobby or Michael's, or you can use pimento, relish, maraschino cherry and jelly jars like the one's shown above that I recycled. After removing the labels and washing out the jars, my hubby spray painted the lids black and then I decorated the outside of the jars with ribbon, lace, paper flowers, etc. These make perfect jars for the foot cream, and it's a great way to recycle!

Here's to spring and soft, pretty tootsies!!
Photobucket

Monday, April 8, 2013

New Adirondack Furniture...


Good morning and happy Monday! Recently my terrific father-in-law built new Adirondack furniture for our back patio, so I thought I'd share a picture of his handiwork with you today. My plan is to make some cute throw pillows for them, but haven't had the time to get them stitched up...maybe while I'm on summer break in a few weeks. :) I am getting antsy to start planting flowers and to get our little veggie garden going, but have held off due to the off and on cold weather we've been having. I did plant a few things in containers on the patio...geraniums, begonias, petunias, impatiens, etc. Mike and I have designated the upcoming weekend to work in the yard and get things beautified for the warm months ahead. We love sitting on our patio in the evenings, sipping on sweet iced tea, sharing stories about our day and enjoying the pretty flowers and the birds singing and splashing in the bird bath. It's just the simple joys that make us happy!

Wishing you a beautiful sunny and warm week!

Photobucket

Sunday, April 7, 2013

Saturday, April 6, 2013

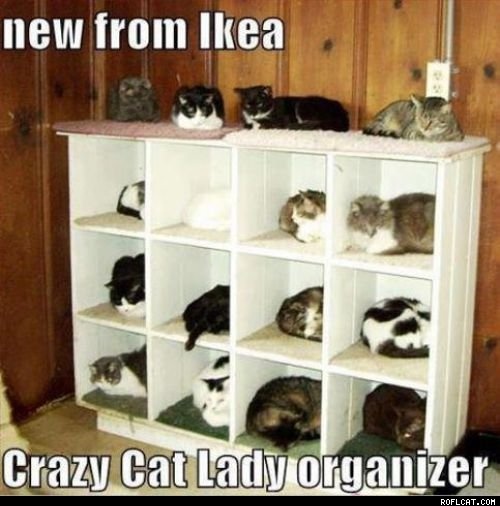
Silly Saturday


(Image found on the internet)

Enjoy your weekend, friends!

Photobucket

Friday, April 5, 2013

A Happy Birthday Shout-Out!


Happy Friday, Friends! Just a quick post today to send a VERY happy birthday shout-out to my TERRIFIC niece Kari, who is celebrating a birthday tomorrow! Kari is an amazing young lady...super sweet, smart, funny, kind...I could go on and on, but I don't want to embarrass her - LOL! Kari has always had a special place in my heart and is one of my very favorite people in the whole world. She is the daughter of my sis-in-law Sandy, and was only 9 years old when Mike and I started dating in 1986, so she and I have basically grown up together! Kari lives and works in Joplin, MO so we only get to see each other a couple of times a year, but when we get together we chat and giggle just like we've seen each other the day before. She too is an avid reader, and we enjoy the same types of literature, so we do text each other often with the latest good reads that we've discovered.

Happy Birthday, Kari - love you bunches!!

Enjoy your weekend!
Photobucket

Monday, April 1, 2013

Old Jar Makeover...How to Take a Not-So-Pretty Jar From Blah to Beautiful!


Hello, Friends! Lately on Pinterest I have seen old, clear canning jars transformed into colored jars simply by using Elmer's glue and food coloring. I decided to see if it would actually work, and above is a photo of the jar that I turned to a pretty shade of blue and decorated with burlap, lace and muslin. Here is a step-by-step photo tutorial on how I created this lovely:

First off, you'll need to round up an old canning jar. As you can see in the photo below, the jar that I had was in pretty bad shape...all etched and milky looking. (I have it sitting on a soy sauce bottle to hold it up while I paint it.)


I then gathered the supplies needed to color the jar...simple ingredients that I had on hand: Elmer's glue and food coloring. I used an old yogurt container that I had washed out to mix the ingredients in:


I poured a little glue into the plastic container, added 2 drops of blue and 1 drop of green food coloring:


Using a plastic knife, I stirred the glue and food coloring until it was the pretty consistent shade of blue that I was going for:


Using a sponge brush I applied the glue mixture to the outside of the jar and allowed it to dry:


Here's a photo of the jar while it was drying...


TA-DAH!! Here's a photo of the jar completely dry...pretty cool, eh??


Next I decided to "spiff up" the jar a bit more by decorating it. I started with a piece of burlap ribbon that I attached to the middle of the jar using Terrifically Tacky Tape:


I then created a flower made from a scrap of muslin that was about 2" wide and about 14" long:


Fold the muslin in half and make a running stitch down the raw edge, gathering the muslin as you go:


When you reach the end of the strip of muslin, hold raw ends together and stitch in place to create a flower:


The flower looked perfectly fine like that, but I decided that I wanted it to be fluffier and have a bit more definition, so I snipped the fabric around the entire flower:


Which created a cute, fluffy flower like this:


I decorated the flower with a pretty chipboard button and a piece jute; attaching the flower to the burlap on the jar using a liquid adhesive called Liquid Fusion that I purchased at Hobby Lobby:


Using additional strips of Terrifically Tacky Tape, I attached 2 pieces of ivory colored lace around the burlap on the jar and then added a couple of pretty blue pearl head pins to the flower:


Using just a dab of CTMH Pearl Create-A-Shade Paint, I painted a simple chipboard key that came in a package of several cute chipboard shapes that I discovered in the $1.00 bin at Michael's:


After the paint on the key dried, I punched a hole in it and tied it to the mouth of the jar using jute twine:


And that's it, folks! I added some florist pebbles to the bottom of the jar, added some water, cut some daffodils from my flower bed and placed them in the jar which is now a beautiful shabby-chic vase. I LOVE how it turned out!! Hmmm...think I'll try to make a pink jar now...


Thanks for dropping by...have a SUPER week!!

Photobucket