

This week our office building is hosting a silent auction of crafts, baked goods, etc. with the proceeds going to the United Way. I made the altered clipboard shown in the photo above to donate for the auction. It's a really easy project, and I thought you might like to make one too, so here's a step-by-step tutorial on how I created this cutie:
Start with a standard clipboard that you can find at any office supply store...I found mine at the local grocery store, of all places!


Cut out the area for the clip and set the scrap of paper aside as you'll use it later for the coordinating ink pen:

Next, cover your clipboard completely with a glue stick...you will probably use about all of the glue stick for this. (NOTE: I prefer using a glue stick for this, rather than another type of adhesive, because the glue stick allows me a little "play" to slide the paper around and make adjustments when I'm adhering the paper to the clipboard.

Adhere the paper to the clipboard, smoothing out any air bubbles as you go:

Cut a piece of coordinating paper about 1 1/2" high and just a little wider than the clipboard. (Remember, later you'll be sanding and inking the edges of the clipboard to distress it). Using a little more glue stick, adhere the strip of paper, slightly overlapping over the paper that you've already adhered to the clipboard.


Using your fingers, curl the flower petals to add dimension. Layer the 3 flowers as shown in the photo below and place a brad through the center of each to secure.


Stamp a flower and leaf motif on each page of a 3" x 3" Post-It note pad.


Place Terrifically Tacky Tape on the back of the Post-It pad as shown:

Cut two pieces of coordinating cardstock, (I used green and purple), on the clipboard. The green cardstock is cut 4 1/2" tall x 4" wide and the purple cardstock is cut 3 1/2" tall x 3 1/2" wide.
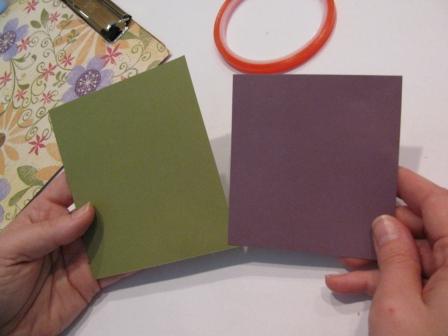
Adhere the purple cardstock on top of the green cardstock and adhere. (NOTE: There will be a taller green border at the top because that will go under the clip).

Attach the Post-It pad to the purple cardstock

Apply Terrifically Tacky Tape to the top and bottom on the backside of the green cardstock and set aside.

Using a sanding block, sand all of the edges of the paper you've adhered to the clipboard, then rub a chocolate brown ink pad around the edges to distress it even further.


Attach the cardstock with the Post-It pad under the clip:


Cut a piece of cork sheeting, (which I purchased at our local hardware store), 5" x 6" and stamp with desired image. (I used the CTMH "Playful Flourishes" stamp set, which will also be retired at the end of the year). Apply a generous amount of Liquid Glass to the back of the stamped cork and adhere to the lower section of the clipboard as shown .


Set several veggie cans on top of the cork for about 15 minutes to ensure that it is securely attached to the clipboard:

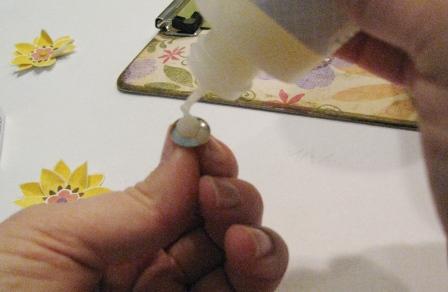
While you're waiting for the cork to dry, apply Liquid Glass to two thumb tacks and adhere a flower to each one. Set aside to dry for about 30 minutes.

Cut a small strip of coordinating paper and attach to the top of a clothespin using a glue stick. When dry, sand edges to distress.


Apply Liquid Glass to the back and attach to the clipboard, to the right of the Post-It pad.


Apply Liquid Glass to the back of the third flower and attach to the top of the clothespin. Let this dry throughly before using clip.


To create the coordinating ink pen, remove the ink cartridge from the pen casing. (I used a Pentel gel pen).

Tie an 8" piece of ribbon to the pen clip on the lid. Trim the scrap piece of paper, (which is the remnant leftover from when you cut out the area for the clipboard clip), to fit the length inside the pen casing.

Tightly roll the paper around the ink casing:

Slide the paper wrapped ink cartridge back into the pen casing and screw the end cap back on to complete your coordinating pen.

Tie multiple types/textures/colors of ribbon to the clip, attaching the tail of the ribbon holding the pen on the left side of the clip:

Here's a close-up of the ribbon tied clip:

Attach your push pins to the cork and your altered clipboard is complete!


I hope that you've enjoyed this tutorial. I'd LOVE to see the clipboards that you make, so please send me an email with photos of your artwork!
Happy Scrappin'!!

This is so adorable. Thank you so much for posting the directions. I just might have to try this. I love that paper you used also. Its one of my favorites.
ReplyDeleteOh my goodness! Everything you make just looks like magic!! I love this clipboard! :)
ReplyDeleteFabulous project, thanks for sharing. I love the fact that you haven't just decorated a clipboard, but have made a ton of accessories for it, the push-pins, peg and pen are all so cool! xx
ReplyDeleteThank you for your step by step, clearly written and nicely photographed project. I love the colors you chose and the addition of the post it note holder and corkboard piece! I really appreciate all the time you put in to describing the details to all of us!
ReplyDelete:)
Just found you online and pinned this project. GREAT tutorial and project idea and I can't wait to do this!! Thank you!
ReplyDelete