For starters you'll need a plain gift box. Mine measures 5 5/8" wide x 7 1/4" long x 1 1/4" deep.
Next you'll want to cut pieces for the belly band. As shown in the photo below, I cut two 12" long x 1" wide strips of Tulip cardstock and used a border punch to trim the edges. I cut one 12" long x 1" wide piece of striped paper and one piece of 12" long x 2" wide chocolate piece of cardstock.
Layer and adhere the pieces together as shown in the next photo:
Now you'll need to wrap the band around the box...use your fingers to crease the band and form it to the shape of the box. Remove the band and, using a bone folder, make "pretty" creases on the band so that it will hug the box nicely.
As you can see, my box is wider than the 12" piece of cardstock that I'm using for the base, so I've got to add a filler piece so that this will actually become a band that will slide on and off of the box. Not to worry though, the filler piece won't show because you'll be decorating the top of it!
Measure the gap between the ends of the band, and cut a piece of coordinating cardstock to fill in the gap. I cut a piece of Tulip cardstock that was 2" wide by about 2 1/2" long.
(Good grief...I should have used some hand lotion before I took these photos...but I digress!!!)
Add a strip of adhesive to one end of the band and attach one side of the filler piece. Wrap the band around the box, add a strip of adhesive to the other side and attach the opposite side of the filler piece as shown in the next three photos:
Now it's time to make some flowers to decorate your band! I began by punching out nine 1 7/8" scallops from Tulip cardstock...I made three flowers and each flower takes three scallops:
The next step is to crumple up each one of the scallops...don't be afraid...really crumple them up!!
Now, un-crumple the scallops and sponge the front and back of each one with Chocolate ink. This will create an aged look to your flowers.
Between every other scallop cut about 1/2" in toward the center of the flower as shown:
Punch a hole in the center of each of the flowers:
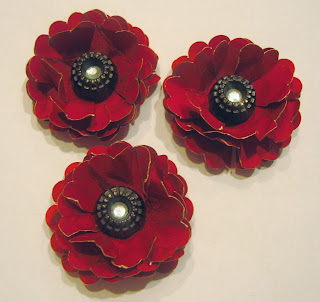
Layer 3 scallops, attach a brad through the center, and then "scrunch" up the petals to form a flower. Repeat with the other scallops and set flowers aside. Pick out three buttons to use as the centers for your flowers:
I like to add a little bling to my projects, so I added some sparkles to the centers of each of the buttons:
I then attached the blinged-up buttons to the centers of the flowers using glue dots:
Using a heart shaped punch, punch out several leaves from Juniper cardstock. Run the "leaves" through a crimper to add a little more dimension:
Set leaves aside and cut several very narrow strips of Juniper cardstock to create the vines:
Curl the strips of cardstock tightly around a toothpick and then carefully slide the "vines" off of the toothpick. You can now bend and form them however you like!
Begin to decorate your band by adding the embellishments you created to the filler part of the band. I started by adhering the flowers, then the leaves, then the vines. Here's a close-up view of the layers:
Lastly, here's another photo of the completed band and box:
I hope that you've enjoyed this tutorial and that is has been helpful! I'd love to see your variations of this project, so feel free to email pictures of your projects to me!
Have a great day!


Heck yeah this is GORGEOUS!! I would even say STUNNING!!! :)
ReplyDeleteBecky That is so beautiful! Those roses look like velvet! So pretty! Thanks for sharing!
ReplyDeleteLove it...great tutorial. Thanks Becky!
ReplyDelete--Margo
MargosGarden.blogspot.com
Thanks for sharing... WOW!! LOVE your design!!
ReplyDeleteGorgeous!!! What a great alternative to a gift bag or paper!! Fantastic tutorial, too. TFS
ReplyDeleteOh--I love this--just beautiful! Great tutorial.
ReplyDelete